Pages

Monday, December 20, 2010

Image Critique by Bambi Cantrell

Have you heard of Bambi Cantrell?
If you haven't, you should.  Her portraits are compelling and so full of emotion.  
But don't just take my word for it....she's been named "One of the 10 Best Wedding Photographers in the World" and also was the first woman to receive the "Icon of Imaging" award from Microsoft.  She's pretty good~  
And if you haven't guessed yet, I'm a fan.  


A few weeks ago Bambi offered a rare opportunity for photographers to send her one portrait image to be featured and critiqued.  Now you'd think the thought of being critiqued by one of the best photographers in the world would scare the pants off me!  But instead I was so excited and emailed her a photo about 60 seconds after I read her blog post announcing the challenge.  I barely took any time deciding which photo to send and just emailed the first one that popped into my head.  I knew it was a slim chance that my image would even make the cut but ya never know until you try.  


This is the image I submitted for the portrait critique......meet Riley ~ 


Isn't she lovely? 
So back to my story.....I was shocked and thrilled when less than 24 hours later I received an email from Bambi herself saying she'd like to use my image!!  My elation quickly turned to being mortified because she also told me that I sent the photo in the wrong format and I needed to resend it for it to be usable. 
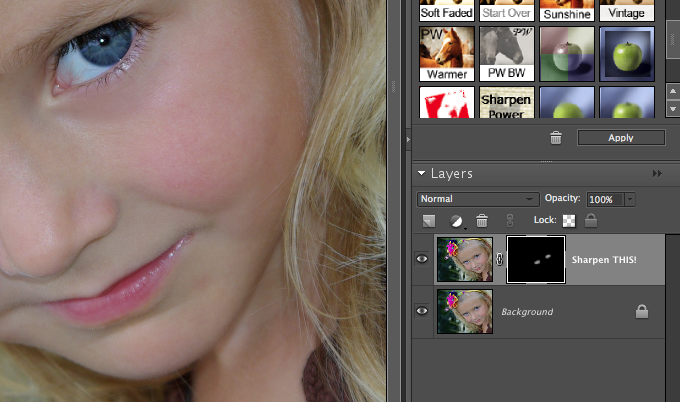
I hate formatting:)  hate it:)


So here's the lowdown ~ Bambi has featured my image on her new pro website that she's created along with a few other photogs you may recognize....Kevin Kubota, Tamara Lackey, Jerry Ghionis...the list goes on.  The site is PWSPI and you need to check it out.  


Each Friday she will critique an image and open the forum for other photogs to voice their opinions as well.  She's classy and kind and the spirit of the critique is not to be mean but to encourage where improvement could be found.  I was thrilled to hear her opinions and I'd love to start participating in more critique forums to gain new perspectives on my images.  


I'd love for you to check out my critique and read what Bambi had to say....and I'd love to hear your opinions too!  You can post your comments on the pwspi site or here on my blog...or both!
You can read the post here...
Bambi Cantrell Critique


And just because I love this lovely girl, here's a few more images from this series....


~ Thank You Riley and Thank You Bambi ~

BTW...did I mention I hate formatting:) 

Wednesday, November 24, 2010

Anatomy of....Girl On The Swing

Today's Anatomy Lesson features my lovely Girl On The Swing.
{not to be confused with Boy On The Swing...totally different stuff}


I just love it when the stars align and everything just fits with a photo~  
I was shooting some family pics of my great friends and while I was trying to get the fam together
for the big group shot, Ms. Amber was in her own little world just playing on the swing.
When I looked over and saw her looking so content....so free....so lovely....I walked over and just snapped a few.  That's all it took~


Here's my original...


The expression and lighting was perfect but I wasn't thrilled with the hair issue on the back so I cropped in a little closer.  


Next I ran Coffeeshop BabyPowderRoom and very lightly softened the skin...it didn't need much.


Then I added a texture from a new site I'm just in love with ~ Jessica Drossin Textures.
Jessica's textures are edgy and dramatic {everything I'm not but love for my photos to be!}.  
And they're priced very reasonable which is a huge plus for me so go check them out.


Back to the photo:)  I used Blush from Jessica's Texture Pack One and erased out the texture
on her body at 100% then erased around the edge of her body at about 35%...(that's the lighter gray area on the layer mask)


Then I flattened the image.  I thought her skin looked a bit drab though so I ran CoffeeshopButterscotch Vintage action and erased the action off everything BUT her skin...


Much better:)  I should have been satisfied but it still looked just a tad cold to me so I ran PW Warmer action, erased from all but her body and lowered the opacity to about 30%.


Here's my final~


Simply. Gorgeous.  


You can check out the rest of the photos from this session in my Facebook album....if you think she's stunning you should see her sister....and her mom...and her brother....and even her dad!  


Happy Thanksgiving Everyone!!

Tuesday, September 28, 2010

My New Love

If you've kept up with me recently you may remember that I was having some serious camera envy earlier this year~


Well I'm pleased to announce that you will not have to deal with my whining any longer...I was finally able to purchase ~ my new love ~


After hours...and hours...and a few more hours weeks of research....I decided on the Nikon d300s camera.


Isn't it just divine?

If you've ever had to make a very large, important purchase and you knew you just had to get it right then you know how nerve wracking it is to choose the ideal camera when upgrading.    Here's why I chose this particular camera:

~ it was a definite upgrade from what I already had in ISO performance and overall quality
~ every review I've read {and there were hundreds!} was positive 
~ several pro photographers I've spoken with own this camera and every one absolutely loves it
~ I liked the way it felt in my hands....it's a quirky reason but very important when choosing a camera
~ it was the highest quality I could buy in my price range

But the fun doesn't stop there...after choosing my camera I had to choose a lens and I knew I didn't want a kit lens, I wanted a "pro" grade lens.  I decided on the Nikon 50mm 1.4.


I knew from the first click that I want to be buried with this lens.  That's how much I love it ~

Here's why I chose this particular lens:
~ I didn't already own a 50mm so I was truly getting something new
~ I wanted the 1.4 aperture for more creative opportunities
~ Every single photographer that owns a 50mm 1.4 says it's at the top of their favorite lenses ever

Now don't be a hater because I have some sweet gear now!  I know how that camera envy can sneak up on ya~  Because of this purchase...
~ my kids will not be meeting Mickey Mouse this year....or any other year...ever
~ my kids will not get to ride in a snazzy new car like all their friends have...but instead they get a used minivan that smells like wet soccer cleats
~ leftovers will be on the menu more than ever 
~ those funky, furry boots I'm wanting for fall will just remain on my Wish List...along with that epiphanie camera bag and pretty much everything else I'm wanting

But enough about that....let me show why I've proclaimed that if my house were on fire I would save my new camera first, and then hopefully a few of my kids...

...this is the very first photo I snapped about 10 minutes after I finally figured out how to open the box while I was sitting in the front seat of my van:


I realize it's not exactly art gallery worthy but I was lovin' it.  About 20 minutes later I took these shots at my session.  
{note:  I would not recommend buying a brand new camera, not reading the manual, and attempting to photograph 6 people all within 1 hour}


Those are untouched, uncropped, uneverything...can you say bokeh?  can you see why I'm in love?

Those shots were perfect as-is but I still had to mess with them just a bit~  I added a touch of butterscotch tint and these were my finals:

        f stop 2.2

 f stop 1.6

So to sum it all up, I'm very pleased with my purchases and I'm glad I took my time and did a ton of research before I decided what to buy.  I really suggest that if you're looking to buy a new camera that you go to a camera store and try out the feel of several different models in your range for a good comparison.  Try different lenses too so you can see how fast they focus and what it's actually like to use the zoom ring or work with a prime lens.  

I tried the 24-70 2.8 and the 70-200 2.8 so one of those will be my next purchase...but I just can't decide....any thoughts??


Friday, September 24, 2010

Behind The Scenes Part 1

NO ~ I haven't fallen off the face of the earth.
YES ~ I've been busy.

Something you may not know about me is that I absolutely love anything that shows Behind The Scenes.
Anything that shows how something was made or created, I'm drawn to it.
I watched all 32 hours of The Making of Star Wars on dvd.  {not the old ones, the new ones}
It was fascinating and I'd highly recommend it if you have an extra 32 hours with nothing to do~

Which brings me to today's post...kind of...
My favorite behind the scenes is seeing how photographers have set up their lighting, props, and all the other stuff that goes along with getting that perfect shot.  Moms with Cameras has a great series on lighting that shows various set ups each week with different photographers.  I love peeking into their world and you should check it out if you like that kind of stuff too~

So a few weeks ago when I decided to do the bravest thing any mom can do {a photo shoot with my own punks!}  I asked my aunt to take a few shots...of me taking a few shots...!  It was fun to see them and I thought I'd share them with you...

Here's what my kiddos looked like most of the time...


Kinda reminds me of those famous Dwarfs...you've heard of Ticked, Sneezy, Neglected and Whiny haven't you?

I eventually threatened enough and got them together for some posing...
This angle...

...gave me this shot...

And speaking of angles...it was really interesting to see what a difference just walking a few steps over 
could make in my image.  Here's a head-on shot of the crew....

Yeah, they look cute enough but that jungle back there is pretty scary!  I walked just a few steps to my right and took the photo from a new angle to get this...


The kids never moved but it looks a little less scary now~
That just reinforced the notion for me to take shots from several angles even if I think the first is good enough.

Here's a few I took of Princess...who has never seen America's Top Model but I do believe she could teach the contestants a thing or two about rockin' the attitude...


Ya think?

I did manage to catch a moment of sweetness and got one that I'm just lovin'~


This shows my fancy stuff...I had my "assistant" holding my new toy, the reflector.  It works wonders when you use it right...which I'm still working on!

{disclaimer:  I have no idea what Alexis' Mum is doing!  Sorry Alexis' Mum, I couldn't resist!}

These are the shots I got from that angle using the reflector to even out the light.  Notice how there's no harsh shadows on the faces even though it was waaaay sunny out with no clouds?  That's the magic of a reflector!


I hope you've enjoyed my little installment of Behind The Scenes Part 1.  And in case you didn't guess, I named it Part 1 because I have more to share later!  

Seriously....I've got lots more coming and so much to tell....I've been busy creating some new marketing products....trying new props and I can't wait to share all about my really fun shopping trip to Dodds Camera~ 

Stay Tuned!


Tuesday, August 17, 2010

Mission Impossible

Princess has been the "cover girl" of my photography business for the past year {much to her brothers' dismay} but recently I wanted to update my business cards and some marketing with a new photo.  But I really liked the old photo I've been using because it's very striking and displays my dramatic style perfectly.  {plus I'm biased and just love showing off my baby girl...!}


So, I attempted to do the impossible for my new marketing and that was to re-create a dramatic, intense photograph of my daughter that I could use in my marketing and evoke a similar look & feel to my previous photo.  No biggie!


I actually had a lot of goals in mind when I loaded up the punks for the yearly family photo shoot...I'll share more of those later....so here's what I was able to achieve for this specific goal....


Here's my old photo that's been on my business cards, website splash page, marketing info...


I think it's very eye-catching for marketing purposes and I just like it.

And here's this years shot that I wanted to use on my new marketing pieces...

I opened my original in Photoshop Elements 6 for mac:

The first thing I wanted to do was sharpen those eyes so I ran Pioneer Woman's Sharpen This action and just brushed the eyes with my brush at about 28%....I've read you're supposed to sharpen last but I couldn't wait...I don't claim to be technically correct~
{also, I really hated to do it this time but I cropped the photo too for a better Rule of Thirds composition}


Next I wanted to focus more on the expression and less on the surroundings so I duplicated the layer
and selected Filter - Blur - Gaussian Blur at 9.4 pixels over the entire photo...

Of course I didn't want her whole face all blurred out so I added a Coffeeshop layer mask and erased the blur heavily on her eyes and mouth and lighter on the rest of the face...you can see the little alien face in black on the layer mask that shows the lighter and darker erasing...


Next I added a texture from the Supernatural collection for just a touch of dimension, nothing fancy this time....and I erased almost all of it from her face and just left it on the edges...


Then I ran the Coffeeshop Butterscotch Vintage action to brighten up the skin tone and because I just love it so much.  It still didn't have the punch I was looking for though so I ran the Coffeeshop Vivid 2 action and selected the Soft setting but erased some of it lightly off her face...

And here's my final~  Meet the cover girl for Inspired by christy 2010!


So let's take a look at my mission:
~ pretty blonde girl - got it!
~ striking blue eyes - got it!
~ intense dramatic attitude - got it!

I'm satisfied with my attempt for a similar look without copying the same exact pose....
what do you think?


Thursday, August 5, 2010

Anatomy of...Pretty Pretty Girl

Let me just say, when you have to look no further than your own family for the most beautiful, most fun, most striking models, that's a really good thing!


My 'nieces' were in town last week and I couldn't wait to do a photo shoot with them.  I tried some new props and they showed up with tons of great accessories...we had plenty of jewelry, fun clothing and even argyle socks~  Can't go wrong with argyle socks!


I've got lots of photos I'll be sharing from their shoot but here's one that I thought you may enjoy seeing my editing process...this one is of Beautiful Emily who is just a natural in front of the camera~


I opened my original in Photoshop Elements 6 for Mac...

I loved her expression here but wanted to change the composition so I cropped the photo but wound up losing space on the left side.  My pic looked like this:

So I chose the Clone tool and cloned in some more of the weeds.  This background is pretty easy to clone but a more detailed background would have been tough~  My final cloning wasn't perfect but I knew I'd be adding some texture so I thought it was good enough...here's what it looked like:


Next I softened the skin in Baby PowderRoom and did a little "facial treatment" on just one little part of her eyebrow...I chose the Clone tool again and cleaned up her eyebrow so it was a finer line along the edge...just call it a pain-free waxing!  
This is what it looked like Before I waxed {cloned}....and you can check out the After on the final pic because I forgot to take a close up shot of it!

It's the fine, little details like that that can make all the difference in your images ~

Next I added a texture from the Supernatural collection...something soft and dreamy...
then added a layer mask and erased most of it off her body...


Next I wanted to increase that dreamy look so I ran the Orton action and reduced the opacity to 82%...


Then, because I just wasn't content with the feel of the photo, I duplicated the layer and ran a Gaussian Blur on the top layer and erased most of it off her face and shoulders...this really intensified the dreamy background...


If you'll notice the black part on the white layer mask you'll see some that's gray and some that's black...this is where I used a lower opacity brush on the edges and a higher opacity on the face.  This eases the transition from focus to blurred and makes it look more natural...or at least that was the plan!

Finally I wanted to brighten the photo just a bit so I ran Coffeeshop Vivid 2 and used the Soft layer at 38% and lightly erased the Vignette in the right corner...


Here's my final...


Isn't she lovely ~

More photos coming from this session including her sisters - Twins! - and argyle socks!


Monday, July 26, 2010

Pretty Blue Eyes

It doesn't get much sweeter than this....a 2 year old baby girl with soft blonde hair and pretty blue eyes.  
Yep, I'm one lucky photographer because that's exactly who I had an opportunity to photograph a few weeks ago.


I've mentioned before how I've used the Orton effect on portraits and here's another example of the great dreamy effect it can add to your photo...
I opened my original photo in Photoshop Elements 6 for Mac:

First I cropped in close...{did you expect anything different?!}
Next I softened the skin, did a light skin glow and defined the eyes in Coffeeshop Baby Powder Room:


Then I ran the Orton Effect action and lightly erased on her face and heavily erased on her eyes...you see the little alien face that's been created on the layer mask by doing this...


Finally I ran the Coffeeshop Vivid 2 action and selected the Soft layer at 60%...

Here's my final image....she was perfection to begin with, I just tweaked the photo~


And don't forget...I'd love to see YOUR photos that you create...post to my facebook page and share the love!


Blog Designed by Rita of CoffeeShop