

Sooo, because I don't have the photography world at my disposal I've had to find a few clever ways to Fake It.
One thing that I've been trying to learn how to do is duplicate the fabulous photos I've seen where most of the photo is blurry but just one tiny part of the subject is in focus. I know that look can usually be achieved thru the proper aperture settings and focal point manuevers. But "proper" is not a word that is often associated with me and my camera abilities! Usually it's not until I open the photo in elements that I realize I should've done that...or this...or maybe even all those other things:) Get my point?
So I've been doing some experimenting with blurring out parts of the photo to keep the main focus...in focus!
Here's a quick run-down of what I've attempted so far...
1. This is my original...I like the composition but wish just the face was the focus and the rest not as sharp.

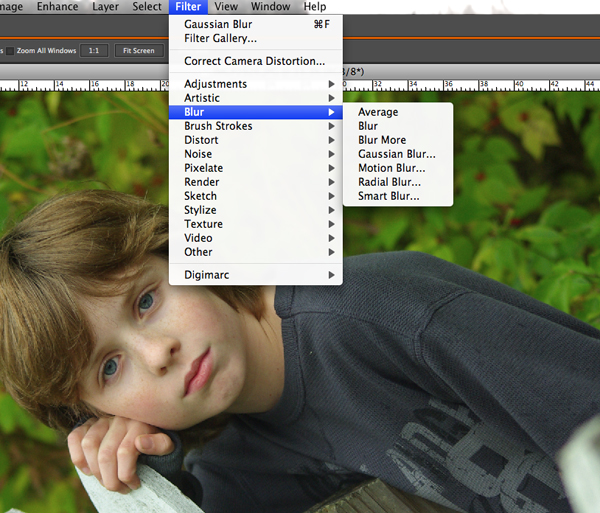
2. I duplicated the original photo to put it on a separate layer above the Background layer. Then I blurred the whole photo. I clicked Filter - Blur - Gaussian Blur at about 8 px. Here's the screen shot...
3. Now the whole photo is blurry so I need to unblur the parts that I want to focus on...
First I chose my Eraser tool and picked a small airbrush round brush. (you can also add a layer mask for flexibility)
Then I made sure my Background Copy layer was highlighted.
Then I started to erase the parts of the blurry layer revealing the sharp layer underneath.
I lightly erased most of the face and a little bit of the hand and top of fence.
Here's my screenshot showing you what my Layers Palette looks like...notice his face is pixeled out in the Background Copy.

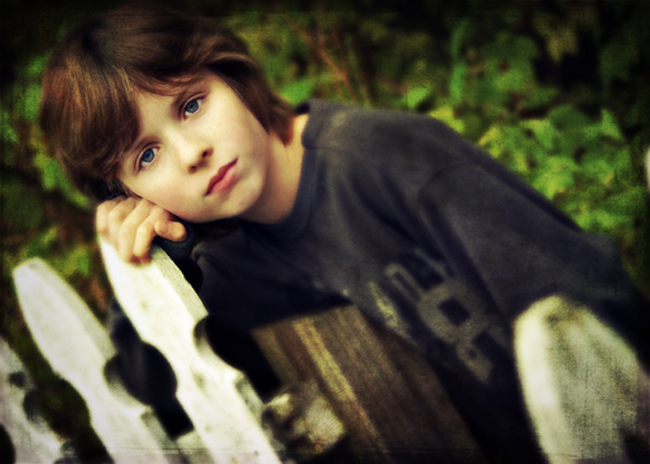
4. That's more of what I was looking for. Just that subtle blur of everything but his pretty little face makes me happy!
Next I cropped the photo to put his head in the top left 1/3 of the photo. Then I did a little color correction and added some textures and actions from FloraBella, Kaleidoscope & Coffeeshop. Here's what I ended up with. I like it.
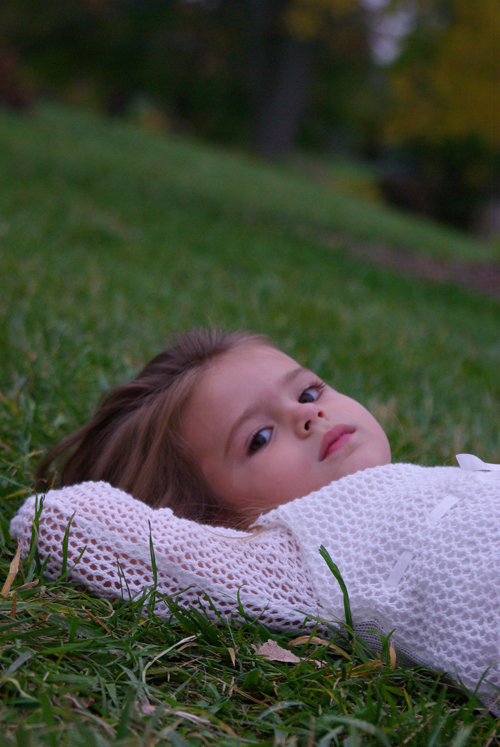
I tried the same technique on this photo...here's the original with almost everything in focus...it's a gorgeous photo...
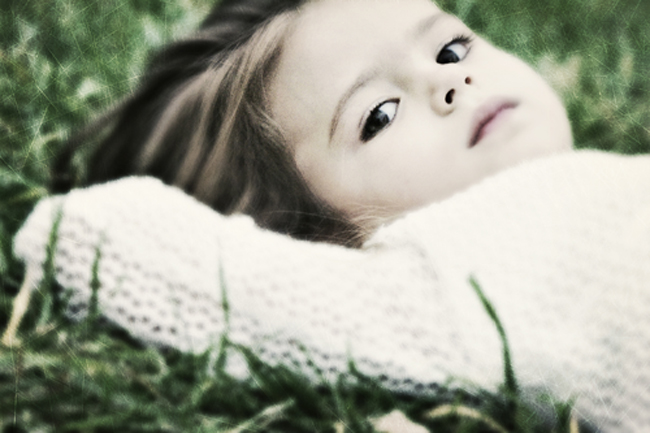
...but I have major issues...I MUST mess with perfectly good photos! Here's the end result after I blurred out everything but her right eye...
So tell me what you think!! And if you have any brilliant techniques for achieving this look please let me know!


6 comments:
Love it! and it is simple. Just what I need. your instructions were great. thanks. i was wanting to do the same thing with my camera but didn't have the money for the lens at the moment. i don't understand what you mean about adding a layer mask for flexibility. I have been using them effectively in some of the coffeeshop actions but I haven't thought of putting one in myself. any tips?
They turned out great!! I have to admire you for wanting to do this yourself instead of clicking a button. I am not that ambitious and I just use actions!! CoffeeShop has some great actions that work in PSE 2+. If you haven't hear of her, go check them out!! www.coffeeteaphotography.blogspot.com
I LOVE Rita with CoffeeShop! I can't believe you have the same name in your immediate family!! That name really isn't common and I LOVE it. Definately keep in touch! We can share PSE secrets, as I have no desire to spend $600 on CS4. I have you on my RSS reader. Thanks for the blog compliments! Maybe you can teach me how to customize it like yours, mine is a template!
Fabulous processing! Love all of this and thanks so much for sharing your knowledge.
Thanks too for stopping over at my blog.
I don't think you give yourself enough credit! Your work is incredible:)
Yvette: by using a Layer Mask I meant to add a Mask to the Background Copy and erase on that instead of the actual layer. Just a little more flexibility...not a huge difference. Coffeeshop has a free layer mask action if you don't already have one.
If I didn't explain well enough just give me a holler!
Post a Comment