

That may sound like a harmless enough phrase, but at our house it packs quite a punch!
With 3 boys in soccer it's a whirlwind of action from now til June. And one of my favorite things about soccer games
is the great action shots I get to shoot. I think action shots are about my favorite since there's always so much passion in them.
Here's a simple photoshop elements tutorial of some effects I recently just started pairing together that do a really great job of making your focus in an action photo (or any photo) really stand out.
Step 1.
Open the photo that you want to enhance. Here's mine of #93 struttin' his stuff. The straight-out-of-camera (SOOC) shot looks pretty good. But if you're addicted to photoshop, pretty good ain't near good enough!

Step 2.
Do any lighting or color adjustments. I'm not even gonna get into all that in this post.....I'll save that for another day!
Step 3.
At the top of your toolbar go to Enhance - Convert to black and white.
This step is optional but I wanted to show you how I did mine so you could follow along.
This is what your screen should look like with the b&w options available. There's several effects to choose
from, just click on them to see which one you like. I chose newspaper which is usually a little dramatic. You can't have 4 creatures and not appreciate a little drama every now and then. I usually increase the contract just a bit by moving the slider.
center> 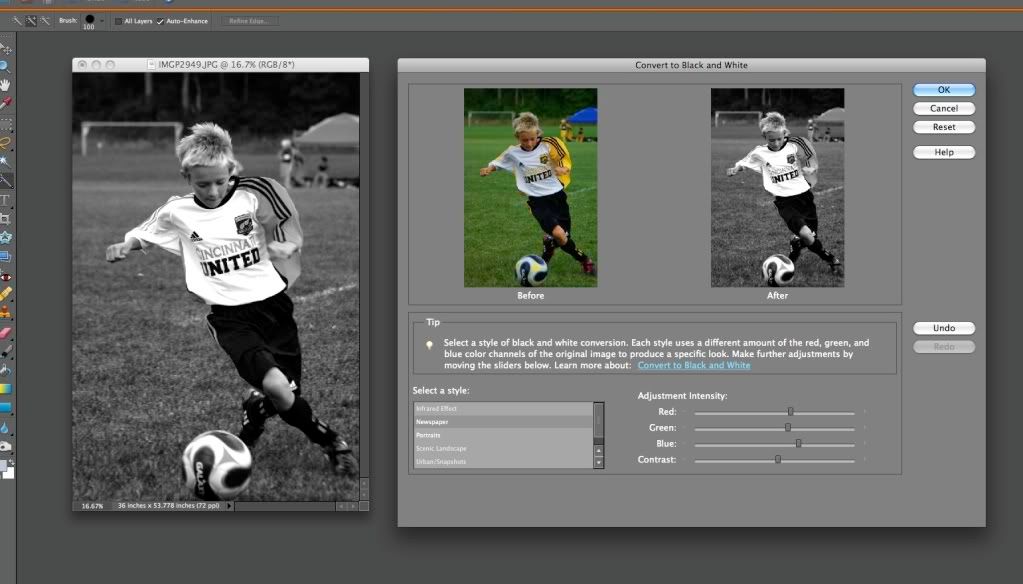

Step 4.
Now we're going to separate the focus the subject from the background. This part takes some practice. It's not hard....just takes getting used to.
Select your Quick Selection Tool. (it looks like a pencil with an oval at the end)
Make sure you've got the + selected at the top of the toolbar to the left.
Now you're going to drag the little circle with the + in it around the subject you want to stand out from the background. You'll see little 'dancing ants' covering everything you select.
For larger areas you can increase the circle, for smaller areas decrease the circle. Do this by pressing the
left [ or the right ] keys on your keyboard. These should be above the return or enter key.
If your dancing ants include something you don't want, click on the - selection (right beside the + selection at top left) and drag over the things you don't want to not include them.
This is where the practice comes in...it can take a while to get it just right!
This is what my photo looks like with my subject selected and I'll show you how to smooth the edges.

To smooth out the edges click the Refine Edge option at the top. This helps you to smooth and feather the edges to your liking. There's no right or wrong, just increase your numbers til it looks how you want.
Step 5.
Now we're going to put the focus on a layer all by itself in the Layers Palette (bottom right hand of your screen).
Press Command J on a mac or Control J on a pc.
This is what your Layers Palette should look like. Notice that #93 has his own layer now? That's a good thing!

Step 6.
Click on the layer titled Background Layer.
Step 7.
Click the half black/half white circle at the top of the Layers Palette. This creates an adjustment layer so you're able to manipulate the layer beneath it.
Choose Levels.
Step 8.
Drag the Output Levels to the Right to reduce the color from the background. Do this to whatever degree you think looks best. Then click OK.
Here's what the Levels adjustment looks like.

Notice how the background is now a lot lighter than my subject? That's another good thing!
Step 9.
Here's where the real fun comes in with action photos! We're going to really make #93 POP!
At the top of your screen select Filter - Blur - Radial Blur.
You have a choice of Spin or Zoom. I chose Zoom.
You can then choose your amount or 'degree' of zoom. I chose 20.
Click OK.
Here's what you've got now.

#93 is really gettin' with it!
Step 10.
Now just a few finishing touches....
Select your subject layer in the Layers Palette. Mine is Layer 1.
Above your Layers Palette should be the Effects Palette.
Choose Layer Styles.
Choose Drop Shadow and select one you like. Double click the drop shadow icon to add it to your subject.
Step 11.
When you're pleased with all how your photo looks choose Layer - Flatten Image at the top of your screen. I always do this before saving my files.
Now you've got a really fabulous action shot with just a little more oomph to it!
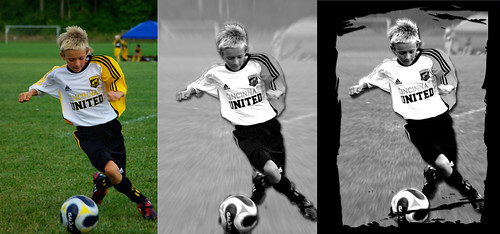
I actually added a grungy frame to mine using the cookie cutter tool and enlarged it to a 16x20 to make a cool poster out of it. Here's the evolution of my photo: (I dropped the zoom down slightly for my poster version)
I hope I've helped you here. Now go grab a photo and create something fabulous!
Be sure to let me know if you decide to give my tutorial a try. I'm sure many of you know lots of shortcuts or other ways of doing these things so pass along your wisdom too!


1 comments:
Fun tutorial! My favorite way to convert to B&W in Elements is to use a gradient map layer. It makes a really nice B&W. It's also fun to do like you did and check out all the preset B&W options. Many people think Elements isn't anything compared to the full version of Photoshop, but it really is amazing what a powerful program it really is.
Post a Comment