Pages

Thursday, June 17, 2010

Anatomy of....Black & White Pretty Girl

In case you haven't noticed, I enjoy cropping.


I'm pretty sure the professionals advise to "get it right in the camera"...but I seem to have fun finding the little hidden gems within photographs...kinda like a treasure hunt!


Here's one of my latest finds...this pretty little girl was running around at a fun Anniversary party I just shot but of course she wouldn't even slow down for a photo op.  I ended up getting a profile that barely even shows her eye.  I almost trashed it but at the last second I took a closer look...


I opened my original in photoshop elements 6 for mac:


Next I cropped in close on just the face and used Pioneer Woman Sharpen This action to extreme 
sharpen her eyelashes, nose & mouth plus the hair around her face and the curl in the back.  Here's my screenshot, the parts in white show where I sharpened with a soft brush at 100%.


Then I softened the skin and defined the lashes in Coffeeshop Baby PowderRoom.


Then I ran Pioneer Woman Black & White action.  After that I decided to add a texture.
I used a texture from the new Supernatural collection...they're so great!  (giveaway coming soon!!)


I erased the texture primarily off her face but kept pretty heavy on the outer edges.

Finally I ran mcp actions Touch of Light/Darkness and lightened the curls by her neck and barely darkened the corner.


Here's my final:


I love this image ~ 

So the next time you're going thru your photos and thinking of keeping only the "perfect" ones,
take another look.  Never know what you'll find!

Thursday, June 10, 2010

The Orton Effect for Portraits

I posted a while ago about how I've been obsessively using the Orton Effect action on my portraits lately.
Typically this action is known for enhancing landscapes but I love the dreamy & hazy effect it has and thought I'd give it a whirl on some faces.  Personally, I love it~


Here's another example of how I used it on a portrait recently:


I opened my original image in Photoshop Elements 6 for Mac...

I lightened under her eyes just a bit using the clone tool on Lighten around 20%.
Then I softened the skin using Baby Powder Room action.

Next I cropped the picture to a square focusing on just her portrait.
Then I ran the Orton Action and adjusted the Brightness/Contrast as follows when the pop-up windows came up:

+39 for the first window on Brightness.


-7 for the Brightness on second window.  I have no formula for this, it's just how it looked good to me at the time.


Then I erased most of the effect off her face using the built in layer mask....what this does is just soften her hair and the surroundings and give it just a touch of a 'glow'~


I love the great color of her hair here but it still looked too ordinary to me so I ran the Pioneer Woman 70's action and took the opacity to 50%...


Much Better:)

Here's my final...


So don't be afraid to try typical actions in new ways....never know what you'll end up with!

Thursday, June 3, 2010

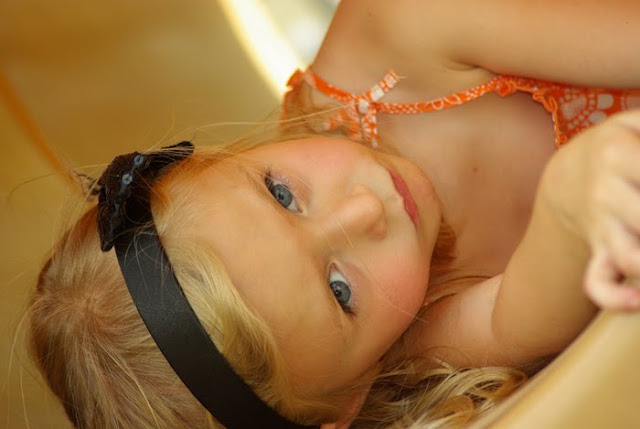
Playground Queen

A few weeks ago I realized that the year was almost halfway over and I had barely taken any photographs of my kiddos doing what they do best....being kids~


I've been concentrating so much lately on becoming a more skilled, knowledgeable photographer that I lost sight for a moment of why I crave photography...it allows me to capture the moments of the people I love best.  


So one evening when we had some time in between soccer games I let Wild Child & Princess play on the playground at the park.  Amazingly enough, they didn't cover their faces in disgust when I pulled out the camera and actually gave me some great expressions while they were having fun.


I thought I'd share an edit from one of my favorites of Princess...


I opened my original in Photoshop Elements 6 for Mac:


The picture is great as-is but I decided to add just a little oomph to it~  I like oomph~

I started by softening the skin just a little with Coffeeshop Baby Powder Room and I also added a slight glow to the skin with the Skin Glow layer and darkened the eyes just a bit...


Next I added a texture from the new Patti Brown Supernatural Textures....I really wanted to play up the orange color...I erased it from most of her skin though and just left it on the tunnel.


Then I wanted to blur out more of the pic and concentrate on her face so I added a Gaussian Blur over the entire pic after duplicating the layer...


Then I erased the blur off mostly her facial area using the Coffeeshop layer mask...


{just a little side note....if I had a better lens, maybe a f2.8 or f1.4 I wouldn't have to fake the blur...but those are still on my wish list!  thank goodness I know how to fake it!}

The next steps are where I started going crazy...I tried action after action after action and just couldn't finish it off the way I wanted.  I think I finally used a combination of Coffeeshop Butterscotch Vintage, Pioneer Woman Boost and Erin's Defog...possibly a few more but I stopped keeping track after several attempts!  Here's what I ended up with...I also cropped in just a bit...


~ I like it ~

Here's a few more from our playground date...I haven't touched these...they're sooc...and I don't think I will edit these.  I think I'll just leave them as-is and cherish the moment~


Princess ~ Age 5 ~ Playground Queen


Blog Designed by Rita of CoffeeShop